Install from a ZIP
Installing from a ZIP is only for unusual situations — most often when you want the newest update right away while it’s still waiting for approval in the Chrome Web Store (review can take a few days). The rest of the time, install Rocket Relay the normal way from the Chrome Web Store — it’s one click and updates itself automatically. See Getting Started.
If you do need the ZIP, follow the steps for your device below — on a computer or on Android.
1. Download the ZIP file
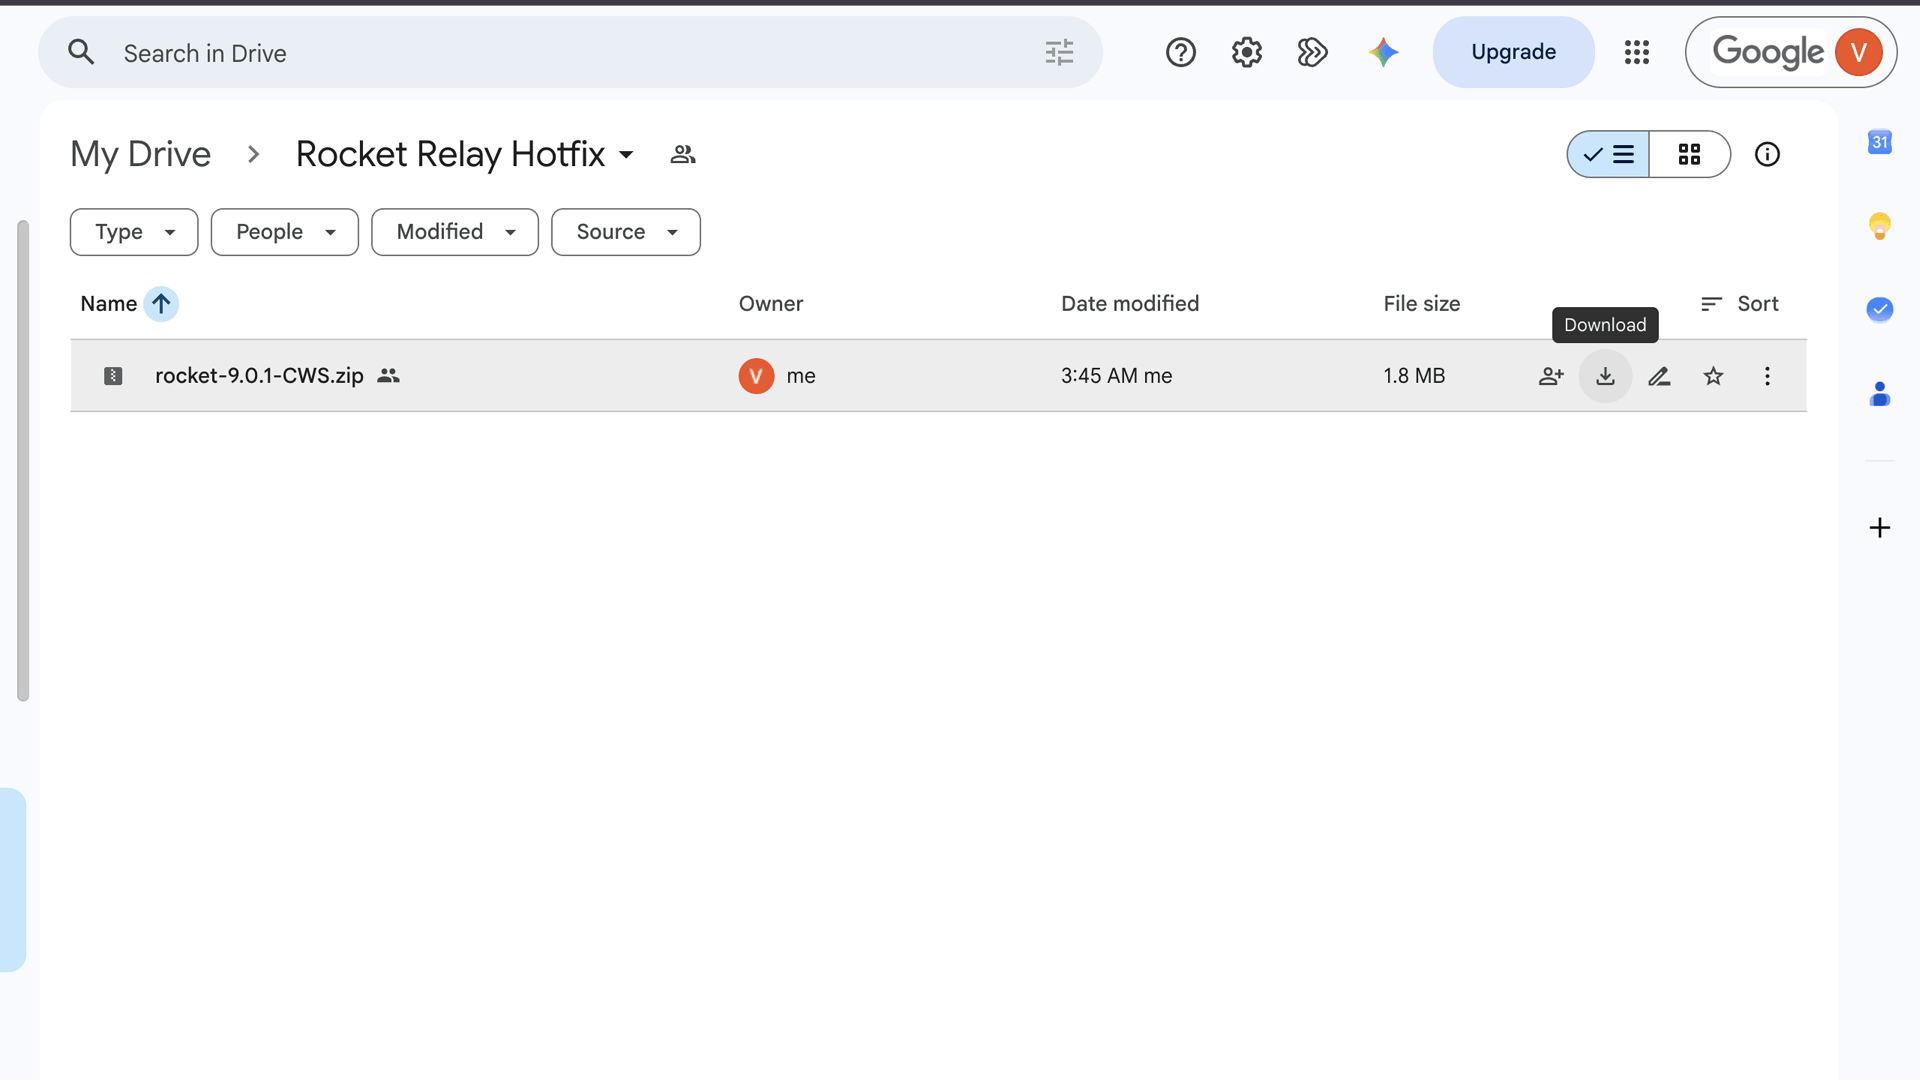
- Open the Rocket Relay download folder on Google Drive.
- Download the Rocket Relay
.zipfile (on the file, click/tap the Download ⬇ icon). - The file lands in your Downloads folder. What you do next depends on your device.
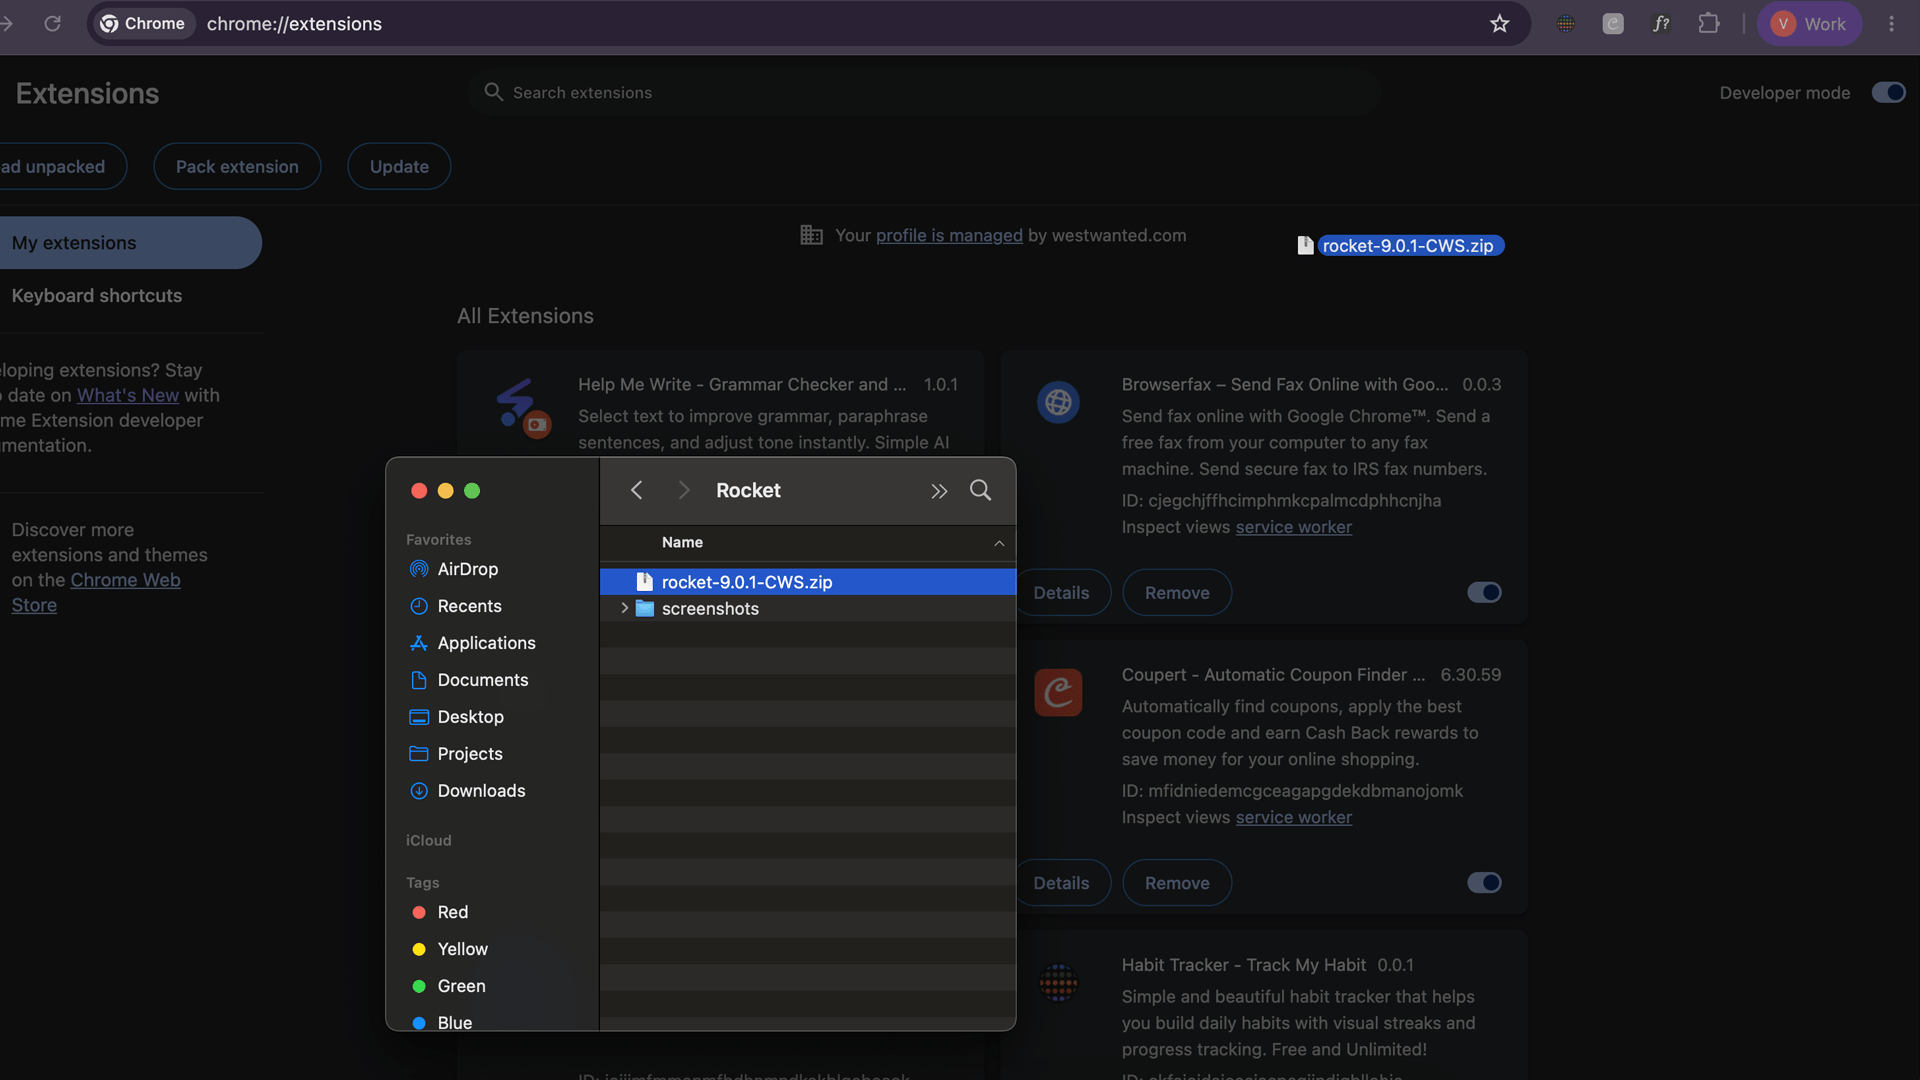
Install on a computer (Chrome, Edge, Brave)
- Open your browser’s extensions page by typing one of these in the address bar:
- Chrome →
chrome://extensions - Edge →
edge://extensions - Brave →
brave://extensions
- Chrome →
- Turn on Developer mode (toggle in the top-right corner).
- Open your Downloads folder, then drag the Rocket Relay
.ziponto the extensions page and drop it. - Rocket Relay appears in your list — make sure it’s enabled. (Optional: pin it from the puzzle-piece icon.)
Install on Android (Quetta)
Chrome for Android can’t run extensions, so use Quetta — a free Android browser that runs Chrome extensions and can install them directly from a ZIP file.
- Install Quetta from Google Play and open it.
- Open a new tab, then tap the three-dots menu (⋮) in the bottom-right corner.
- Select Settings, then tap Extensions.
- Tap the (from .zip/.crx/.user.js) button and choose the Rocket Relay
.zipyou downloaded from Google Drive earlier (leave it zipped). If you don’t see the button, switch on Developer mode at the top of the Extensions page first.
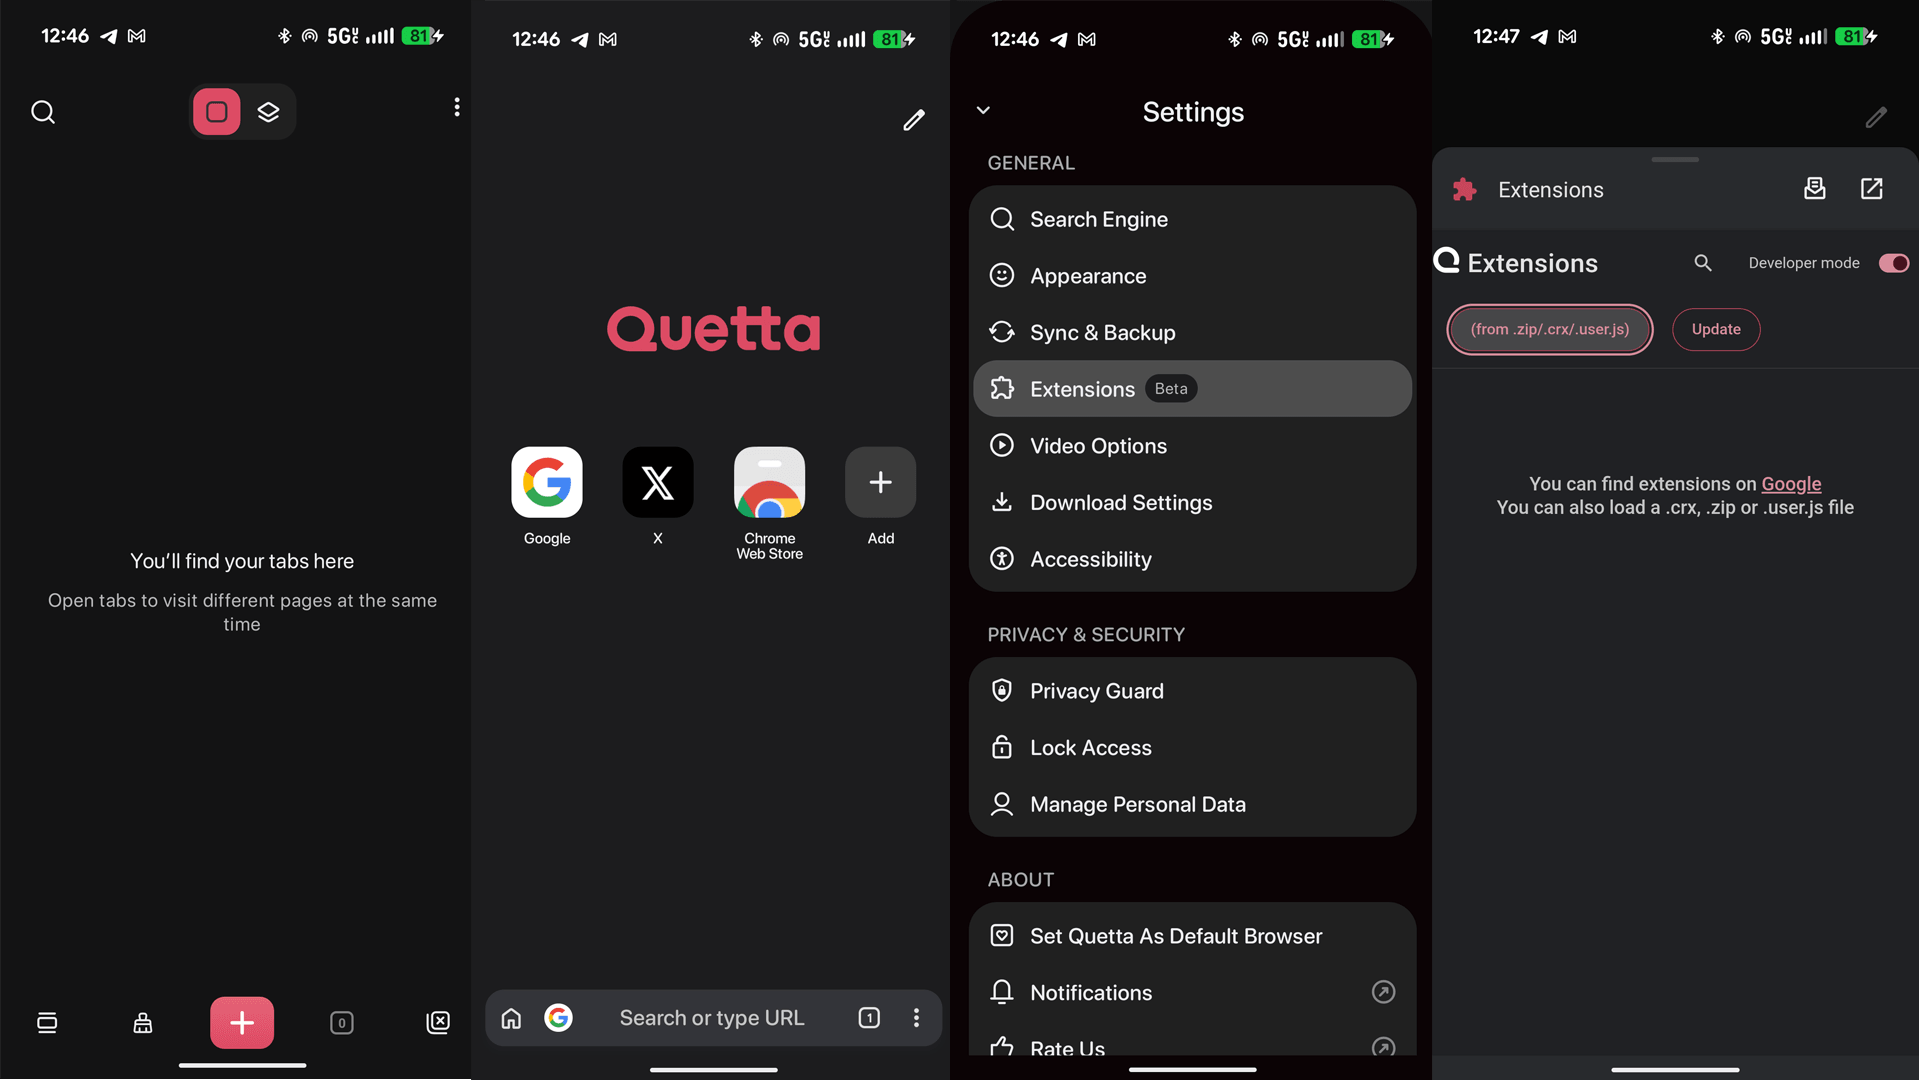
- Confirm any permission prompt. Rocket Relay now appears in your extensions list — make sure its toggle is switched on.
Sign in and start
- Open the Amazon Relay loadboard at relay.amazon.com/loadboard.
- The Rocket panel appears on the page — click Sign in with Google.
- Choose a mode and press Start. New to the controls? See Getting Started.
Keeping it updated
Stuck on anything? Email support@rocketrelaybooker.com with your License ID, or check the FAQ.